Guest messages in Ozeki SMS Wall
You can convince your audience to send free messages. They can easily do it by opening the webpage URL you provide them. In this tutorial we will activate guest messages and show the delivery URL on the wall. We will also send a test message in the tutorial and in the video below.
People can send guest messages through the wifi network of the conference room or if the room does not have a wifi network, you have the option to create an access point, so the audience can connect to it. People with a smartphone looking for a free option prefer this form of message posting.

STEP 1: Create guest link to accept messages
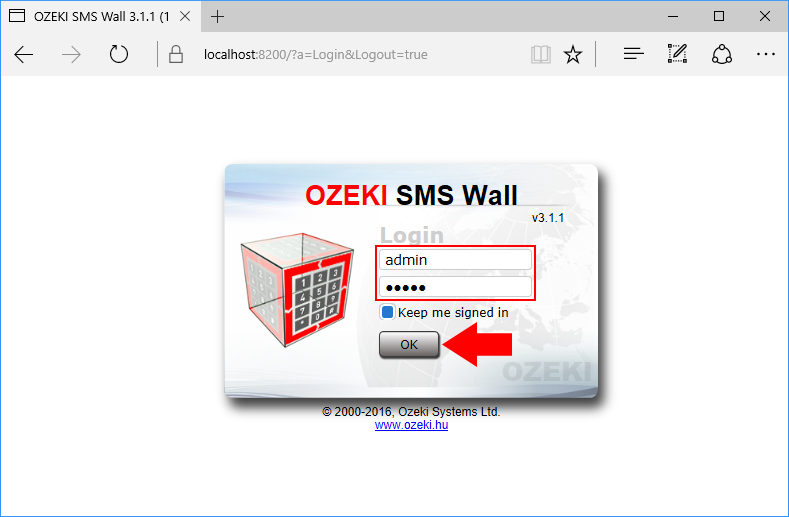
Creating a guest link is essential since it will be shown on your display for your audience to see. The first thing to do is to start Ozeki SMS Wall and log in (Figure 1).
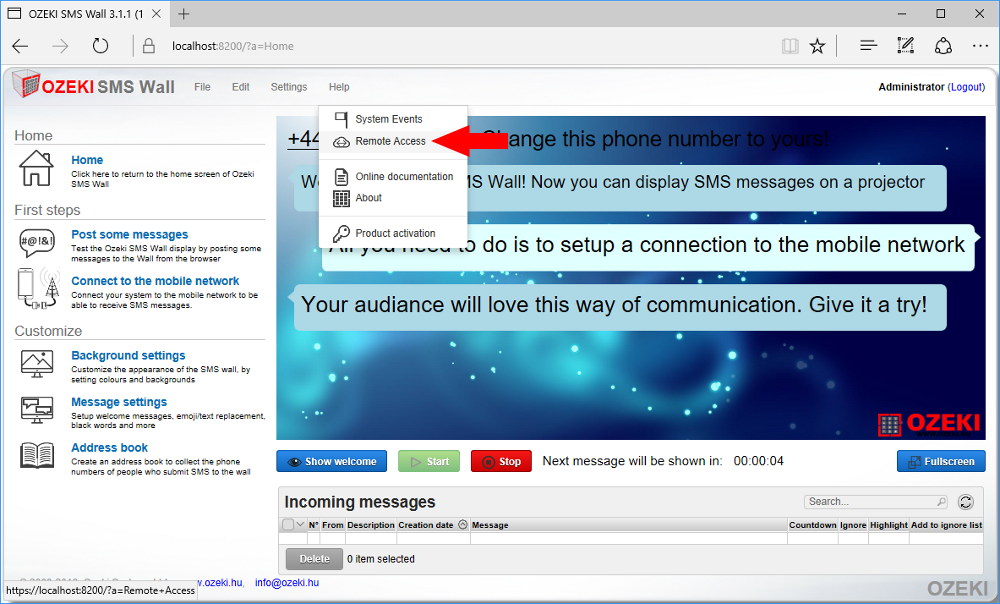
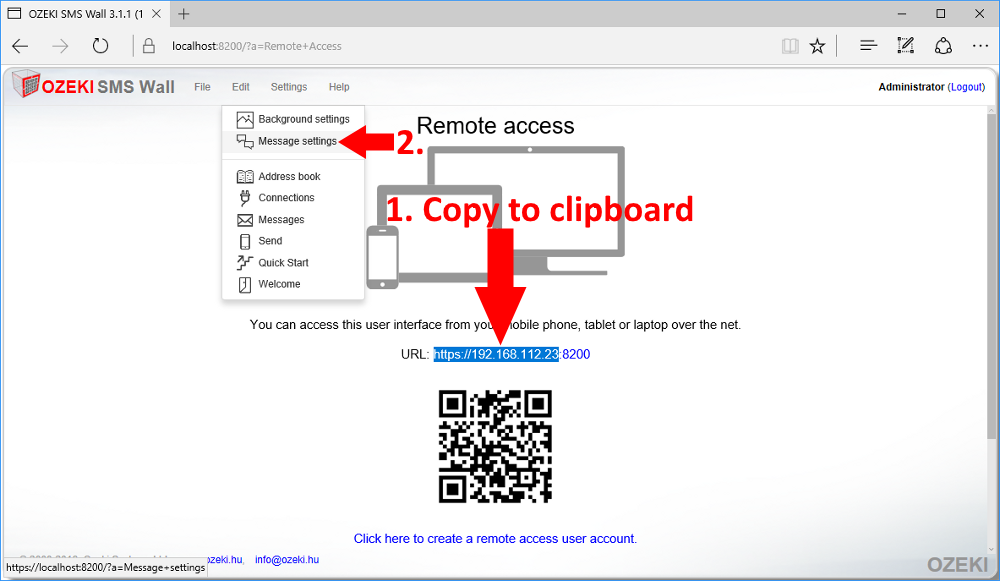
You need to know the IP address of your machine. To do this choose 'Remote access' from the top menu.
On the remote access page select the IP address from the URL and copy it to your clipboard (Figure 3). The remote access port number is equal to the guest access port number, so it is irrelevant if you include it or not.
Click on 'Message settings' from the top menu to activate your guest URL.
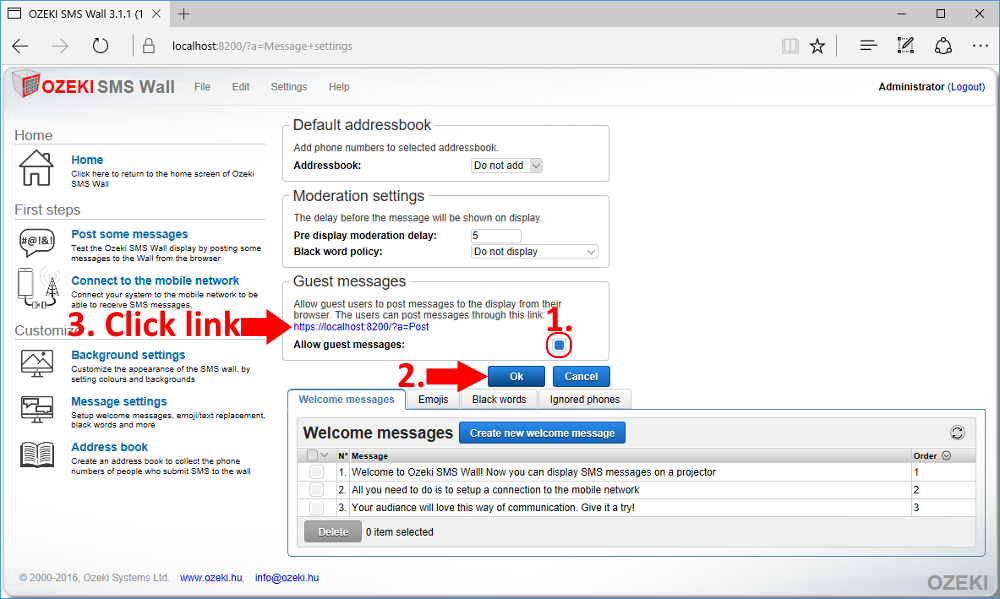
On the message settings page you need to allow guest messages and click 'Ok' to save the settings. Then click on the provided localhost link (Figure 4).
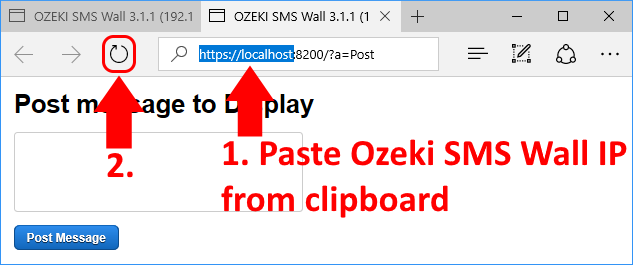
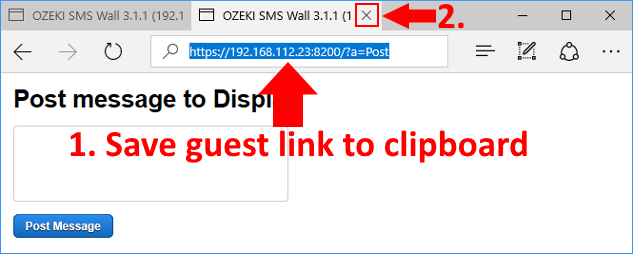
If everything went fine you will find yourself on the 'Post message to Display' page where you need to modify the browser link by changing 'localhost' to your Ozeki SMS Wall's actual IP address (Figure 5 - upper). Test out the link by refreshing the page. Finally if the refresh was successfull save the whole guest message link to your clipboard (Figure 5 - lower). You can now close the guest message tab.
STEP 2: Share the link on your wall
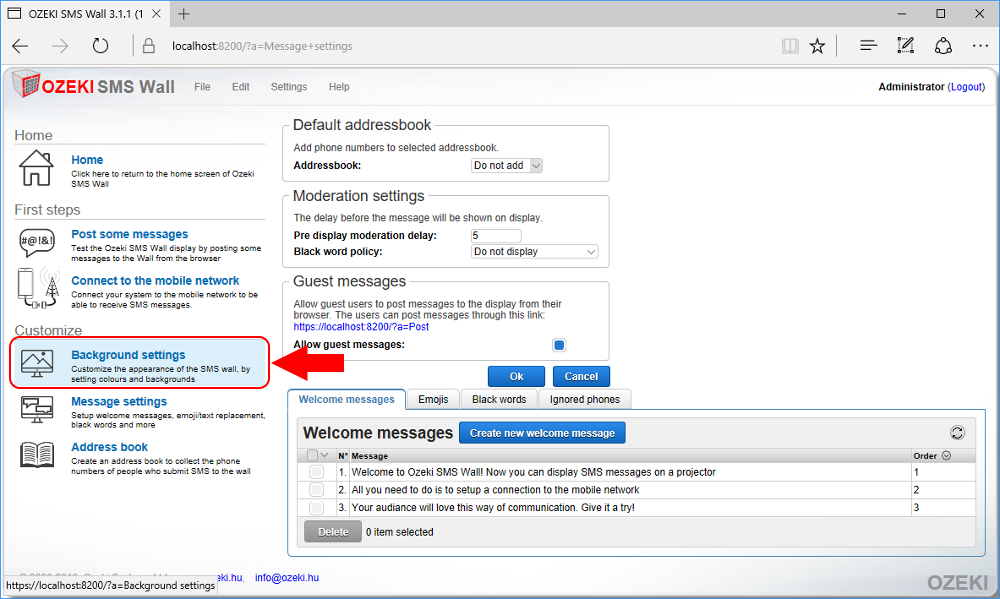
Now that you have the link, you should show it to your audience. To do this click on 'Background settings' from the left side menu.
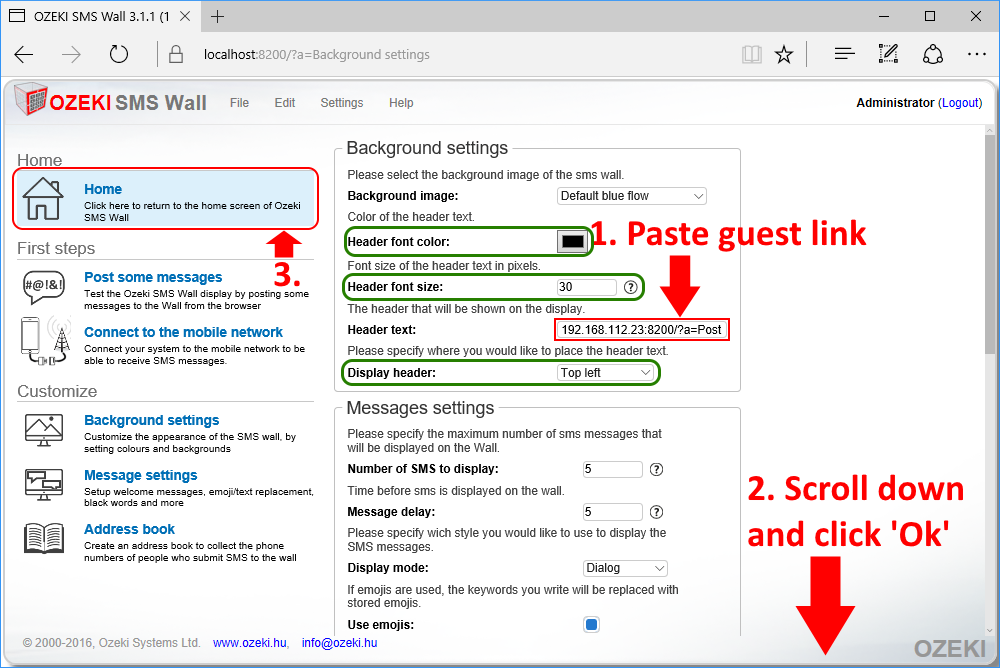
Paste the link into the 'Header text' field then scroll down and click 'OK' to save the header text (Figure 7). You can optionally change the size and color of the header text. You can also set the place where the header should be displayed. After modifying the font size make sure your audience sees it.
I think you are getting curious how will your wall look like. You should go back and check it out. Click on 'Home' from the left side menu (Figure 7).
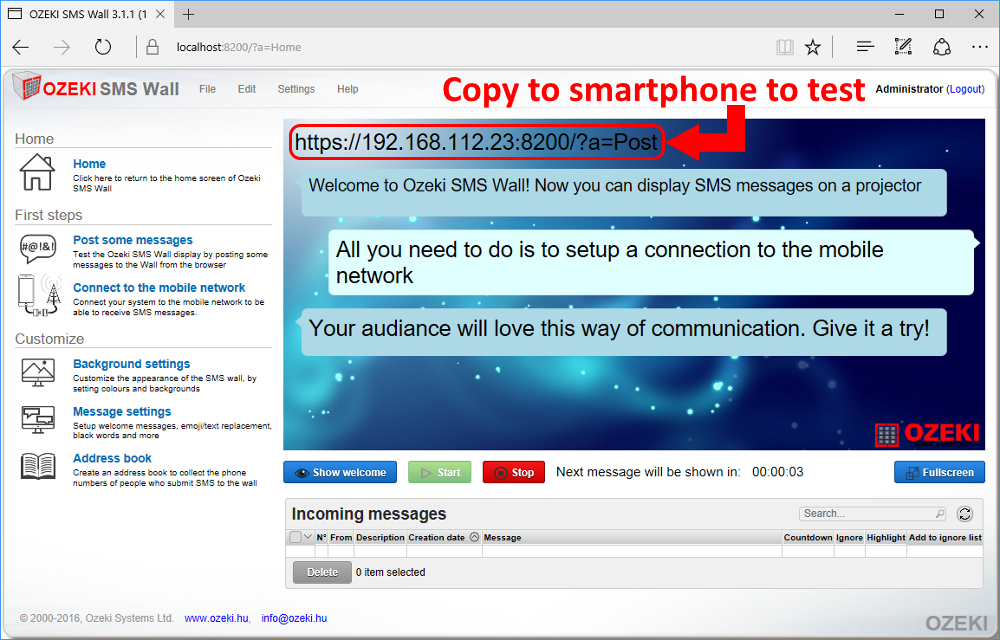
Look at the SMS wall. The header text has changed from the phone number to the guest link.
STEP 3: Post test message to the wall
If this weren't a test, you should ask your audience to connect to the same wifi network you are connected to and type the URL they see on the screen, so they can send free messages to your wall. Their message can contain any letter or emoji that is supported by their phone.
But since this is just a test you need to do this on your own. Take out your smartphone and connect to the same network Ozeki SMS Wall is running on. Then open a webbrowser and go to the URL (Figure 9) that is shown on your SMS wall. You can find it at the location we show it in figure 8.
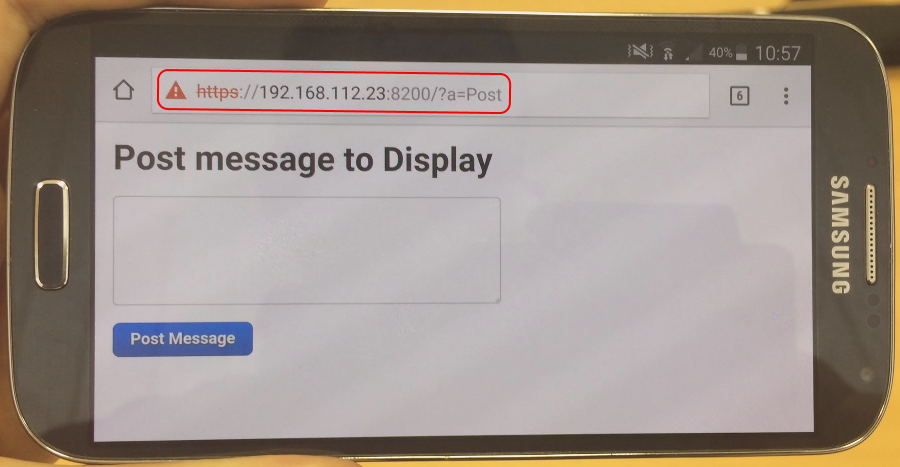
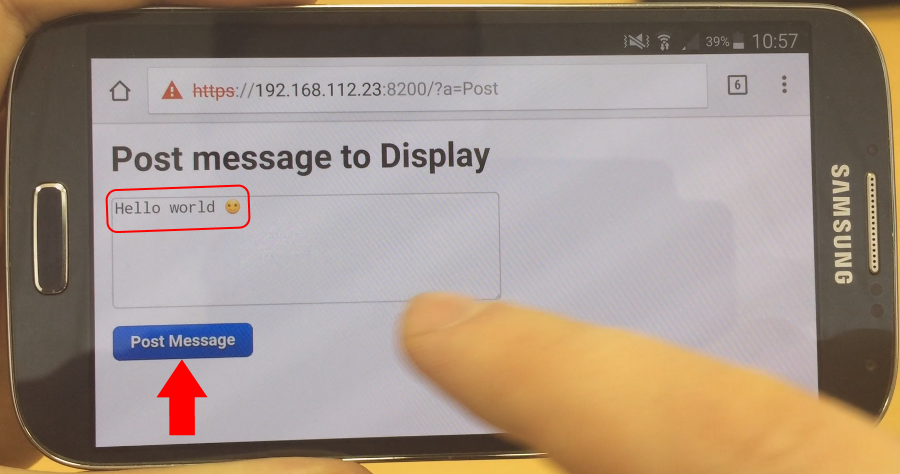
You can write any message. It can contain every kind of emoji sent from your phone (Figure 10).
Finally click 'Post Message' to send your message to the wall (Figure 10).
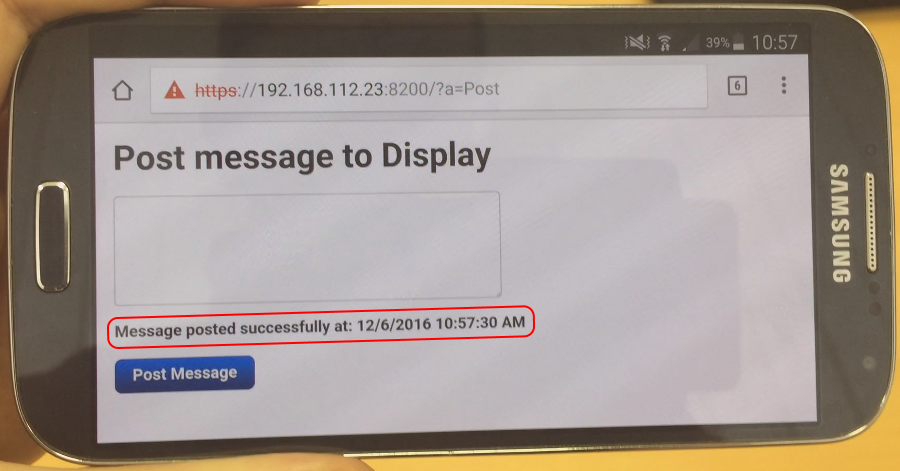
If everything went fine you will see a notification on your phone that the message have been posted (Figure 11).
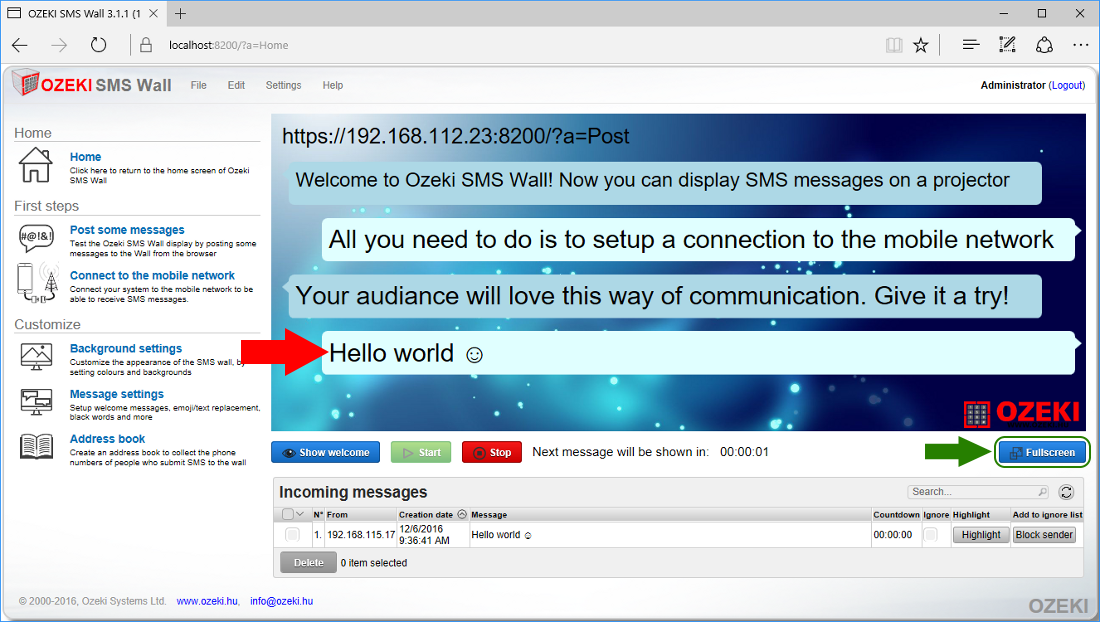
If you look back on your wall, you will see the message arrived in the 'Incoming messages' section (Figure 12)
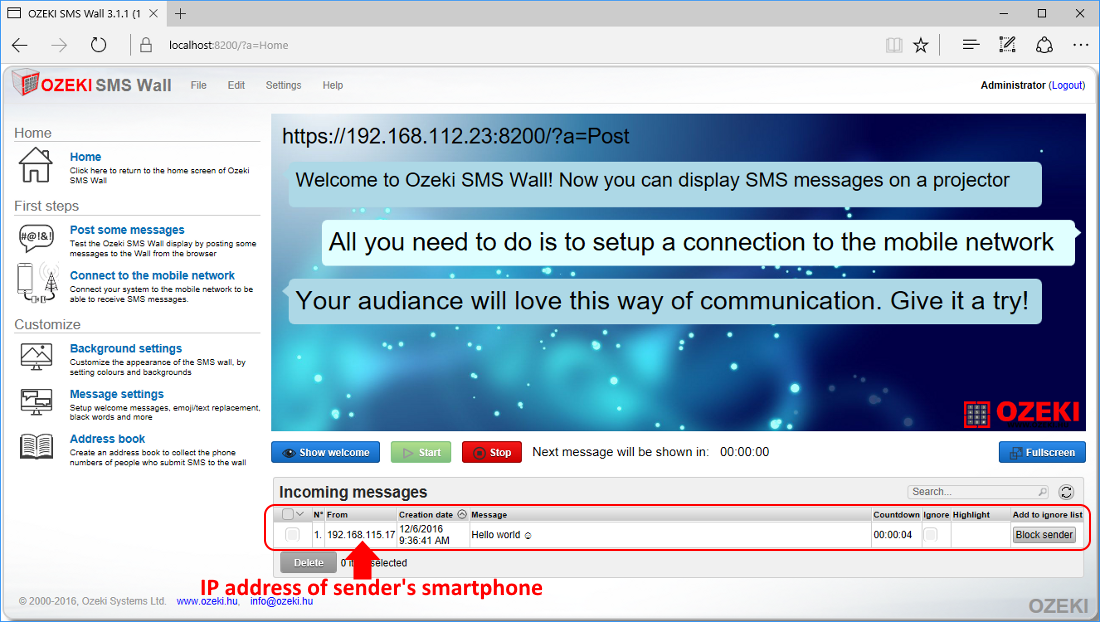
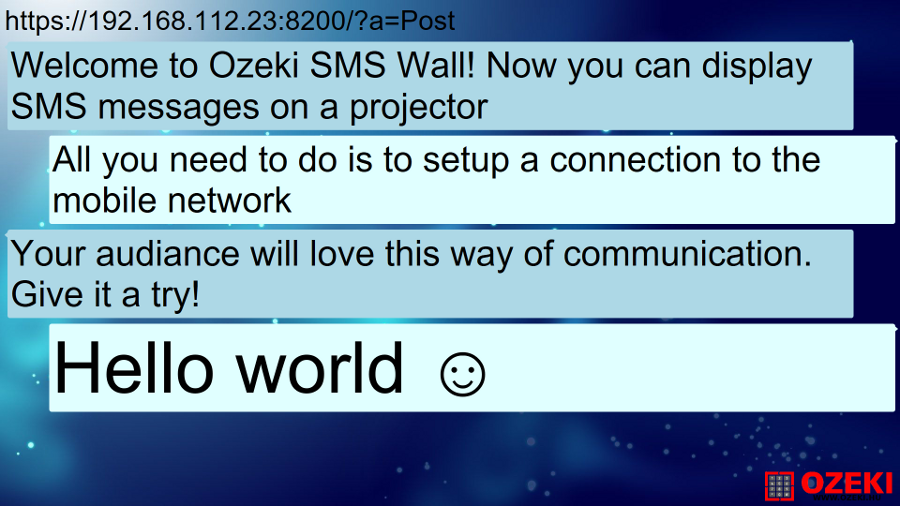
You will have some time to delete the message in case it is inappropriate or offtopic. After the time has passed it will appear on the SMS wall (Figure 13). You can optionally switch to fullscreen mode if you would like to.
